In this video, I’ll be providing an introduction to the use of compressors for audio engineers. I’ll be presenting this material at a foundational level for those of you that are new or inexperienced to using compressor.
I’ll talk about the basic functionality of how a compressor and also get into the key terms that are necessary to understand for using a compressor.
Now for an experienced audio engineer, a compressor is nothing more than a dynamics processor for loud sounds. I’ll get to what that means in a second.
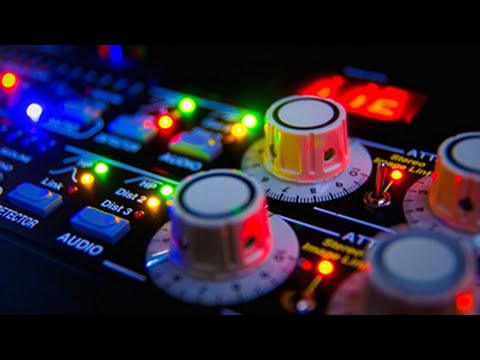
Compressors come in all different shapes and sizes. They come as hardware compressors. They come as software compressors that can be used inside of a computer. For those of you that are working with a digital audio workstation, most of the time these days your DAW will come with a stock compressor plugin that you can use to process audio that you record.
Now, when you first open it up, it might be a little bit confusing about, well, what do all these controls do, and what can they be used for, and I’ll try and cover all that in this video.
There’s also a whole bunch of other third party plugins that you can purchase that can be used inside of your digital audio workstation, and many times they even emulate hardware compressors that you can purchase and use for your recordings as well.
They might look all a little bit different and seem like, well, I don’t really understand how this one works versus another one, but if you understand the basics of how a compressor functions, you can use all these different ones even if they have slightly different controls.
You can have compressors that are great for different situations in your mix. Maybe it’s good for compressing individual instruments. Or, you could use a compressor across your entire mix to compress all the signals when they are summed together.
The thing to know though is if you understand how one compressor works, all these different controls on one compressors, you can then experiment with different compressors in the same situation and find out what works best for you and your particular situation.
Let me get to now, the topics to cover. I want to cover what is a compressor, how does a compressor work, and what can compressors be used for then, most importantly. To begin with, what is a compressor? In very common language, a compressor is a processor that deals with loud sounds. So what does it do? A compressor will detect when a signal that you have recorded is loud, and when it detects that a signal’s loud, then it’s going to respond to that loud sound by making the signal after that quieter.
To put this in language that an audio engineer would work, a compressor is a dynamics processor. It deals with loud sounds. It’s going to detect when the amplitude of a signal is greater than a threshold. That’s what it means when it detects that a signal is loud. Finally, it’s going to respond by attenuating the signal’s amplitude.
Let’s look at, how do compressors work? For those of you that are working with a digital audio workstation, hopefully a diagram like this isn’t something that’s too confusing for you. This is a signals wave form that you’ve recorded. This might be an instrument like a bass guitar or a flute that has a long, sustain. What you’re looking at is how the amplitude of the signal changes over time.
Now for a compressor, many of them do not respond to a lot of the minor fluctuations and variations in the signal that are a result of the signal’s pitch, that show up in the signal’s wave form. But if it’s going to just respond to loud sounds, the compressor wants to ignore when the amplitude of the signal changes very fast.
If this is our input signal that’s going into our compressor, what’s going to happen is the compressor’s going to actually analyze the signal to get out something along the lines of what’s called a signal’s envelope.
That looks something like this, where the black line, it just gets out kind of the average amplitude over time, and it’s going to work with the envelope rather than all these minor fluctuations in the signal.
There’s different kinds of dynamics processors that actually work with and detect the peak of a signal, but a compressor for the most part is just going to work with the detected amplitude of the envelope.
Let’s get into now how it actually works. First off, we have the threshold.
The threshold can be set a lot of times on a compressor. What’s going to happen is when the signal amplitude is lower than the threshold, the compressor’s not going to do anything.
It’s not going to attenuate the signal. It’s not going to decrease the amplitude. So these parts of the signal over here that are below the threshold, the compressor doesn’t do anything.
Then there’s the part of the signal that’s above the threshold. During this part, the compressor in theory is going to decrease the amplitude.
How would this work in an example, then? We have our signal coming into our compressor, and initially it’s below the threshold. As soon as it goes above the threshold, how does the compressor respond? It’s going to attenuate it, but how much attenuation is it going to apply? This is where the ratio comes into play.
This is a control a lot of times on a compressor. You can have compressors that have a fixed ratio, where you can pick different ones. You can pick two, or you can press four, or eight. Or you can also have a compressor that has a variable, where you can select anything in between these different integers.
So to begin with, let’s look at a ratio of 2:1 that can be selected. What this means is that when the signal, the input signal is two dB above the threshold, or a level of two above the threshold, the output of the compressor is only going to allow a half amount of that amplitude to go through.
The output signal that’s above the threshold is going to be half of the amplitude going into it. You can also have a ratio of four to one. That means the output signal is a fourth of the amplitude of the input signal whenever it’s above the threshold.
Then you can go all the way over to limiting, which is a very high ratio, maybe in some cases it’s listed as ten to one, or it can also be listed as infinity to one, where basically none of the signal that goes above the threshold is going to be any louder than the threshold. It basically sets the level and says the output cannot be above the threshold. That’s the idea.
There’s been one important assumption that I’ve made throughout this basic example to begin with. That assumption is that compressors behave instantaneously.
What do I mean by that? I mean that as the signal came in and went above the threshold, right away the compressor started to attenuate it, and then at the end, when the signal went below the threshold, that right when it went below the threshold, the compressor stopped attenuating the signal or making it quieter.
In reality, compressors have controls that allow it so that it does not behave instantaneously. Let’s go back to this example when I looked at our ration of 2:1, and it looked like this.
One of the controls that shows up on a compressor many times is the Attack time. What this is going to mean is you’re going to delay the amount of time that a compressor takes before it attenuates the signal at its steady state level of, in this case, 2:1. You can use the Attack time and vary the amount, the time that it takes for the compressor to respond.
As soon as that signal goes above the threshold, the compressor’s going to detect it, but then you’re going to say, well, wait a few milliseconds or a little bit of time before you get to the part where you are really attenuating the signal.
Each compressor can behave a little bit different on how the attack time works, and that’s what gives each one of them their own characteristics, but for the most part, you know the general idea is something like this.
The same thing goes for the Release time. As soon as the signal goes below the threshold, you can tell the compressor to continue to decrease the amplitude of the signal even after it’s below the threshold.
You end up with something like this, where the quiet signal that’s below the threshold is actually attenuated like this, where the compressor, it takes a while for it to go back to not compressing or attenuating the signal. That’s the basic idea.
Let’s look at an example where our signal looks a little bit different.
Many times when you’re working with audio, the signal doesn’t look like some boxcar shape, but many times if you have drums or something, and you want to compress drums, the signal looks something like this, or the envelope looks something like this. We have a transient at the beginning and then, the sustain.
Here’s what you can use a compressor for in this kind of situation. One would be to have a sharp, a very fast Attack time that’s going to decrease the amplitude of the sharp transient at the beginning, and then also a very fast Release time, such that as soon as the signal below the threshold, it’s going to stop attenuating it.
What this is going to do is decrease the amplitude of the transient and allow the sustain to be relatively louder compared to the transient.
If you want to decrease the amplitude, your drums are too Attack-y, you have too much snap in them, you could decrease the amplitude like this.
Another common thing to do with this kind of situation after the fact that you compress it is to actually apply what’s called Makeup Gain, and this is another knob that can show up a lot of times on a compressor, where you compress the initial transient, but what you want to do is bring up the overall level and change the dynamic range or the difference between the loudest part and the quietest part.
You can use the Makeup Gain to add it back in so that you’re not decreasing the perceived level, and in many cases you’re actually increasing the perceived level, because the sustain now on the envelope has been increased relative to the transient. So this is one example.
Another thing to do instead of using a fast Attack and a fast Release control, would be to use a slow Attack, where you tell the compressor I actually don’t want you to respond initially when the snare drum hits or the kick drum hits, that you want the Attack to pass through the compressor or the transient to pass through and wait a little bit of time for the Attack to kick in.
After that Attack time, then what we’re going to do is actually decrease the sustain. You set a long Release time then, where as soon as the signal goes below the threshold, the compressor’s going to continue to decrease the amplitude or attenuate the amplitude of the sustain.
What does this mean? This means that your drum hit is actually going to, you’re going to be emphasizing the transient. It’s going to make your drums a little bit more punchy, stick out more in the mix because you’re emphasizing the transient of every time the drums hit.
These are different things that, depending on your mix, depending on your song, you might want to try out and see, well does one work better than the other? And that’s the basic idea.
In summary, a compressor can be used to control how loud a signal is, how loud a signal can be. You can limit it and say ‘I do not want this signal to go above this level’. Many times, that’s a very useful application.
You can control the dynamic range. You can make loud sounds quieter, or you could also make quiet sounds quieter.
Finally, you can use compressors to enhance aspects of a signal’s envelope.
You can emphasize the transient, or you can emphasize the sustain or the decay in a signal.
Hopefully, this gives you guys a better idea about the different controls and things that show up on a compressor, what you can use them for, and now all it means is just going and experimenting with a compressor in your actual mixes.
So good luck and hopefully you guys have a better idea now about how to use a compressor.